
Learn how to
get

on the purchase
or rental
of a
HD P&P Pkg.
with
Massachusetts
Tax
Credits
Learn about
the
Elec. Engineering
Principles

behind
our
HD P&P Pkg


Operation Manual
![]() Strict adherence to these operating instructions is required for the safe operation of the extended run fuel tanks. If you follow these instructions you should never have to refuel your generator in the course of a normal work day.
Strict adherence to these operating instructions is required for the safe operation of the extended run fuel tanks. If you follow these instructions you should never have to refuel your generator in the course of a normal work day.
is an extreme fire hazard and can lead to personal injury.
Refuel the extended run fuel tank instead.
____________________________________________________________________________________

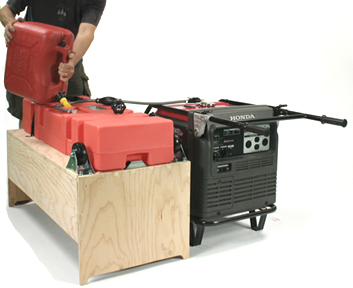
____________________________________________________________________________________![]() The Extended Run 14 Gallon Fuel Caddy come complete and requires no assembly. The 16 Gallon Extended Run Fuel Tank arrives completely assembled except for the
castors and tilt-stop plate (pictured above) which have been removed for shipping. Simply re-attach the castors and tilt-stop plate with the carriage bolts
provided and you are ready to go.
The Extended Run 14 Gallon Fuel Caddy come complete and requires no assembly. The 16 Gallon Extended Run Fuel Tank arrives completely assembled except for the
castors and tilt-stop plate (pictured above) which have been removed for shipping. Simply re-attach the castors and tilt-stop plate with the carriage bolts
provided and you are ready to go.
Extended Run Fuel Tanks

- Fill the remote fuel tank and the generator's onboard fuel tank with gas.
- To purge air from the fuel system you must initially turn the fuel valve lever on the generator to the "On" position.
- Connect the remote tank to the generator with the arrow on the prime bulb pointing towards the generator.
- Open the vent on remote tank.
- Open the Dual Brass Fuel Shutoffs at base of remote tank (14 Gallon Fuel Caddy Only.)
- Pump the prime bulb until it feels firm (about 4 times.)
- Start generator according to the Owner's Manuel instructions.
- Move the fuel valve lever on the generator to the "Off" position.
- Generator will now draw fuel from the remote tank and is ready for operation.
- Should the remote tank run out of fuel, turn the fuel valve lever on the generator to the "On" position to draw fuel from the generator's onboard fuel tank.
Additional Set-Up Instructions 16 Gallon Extended Run Fuel Tank

CAUTION: be sure the second strap holds the quick-connect end coupler of the supply line above the fuel level in the tank to avoid fuel spillage.


____________________________________________________________________________________
____________________________________________________________________________________
Each component of our
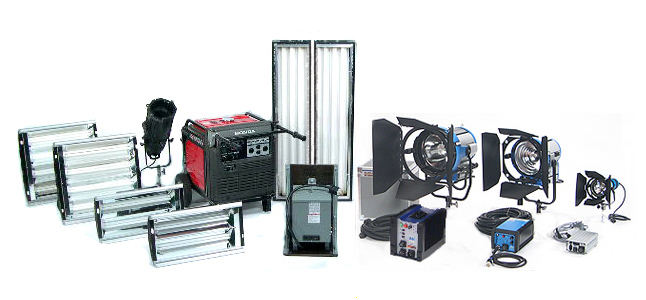
"HD Plug & Play Package"
is available for
Rental or Sale
Mole Richardson, K5600, Power to Light, Kino Flo, and Honda.
These technological advances in lighting design now enable the use of bigger lights, or more smaller lights, off of standard wall outlets or off a new generation of quieter and more powerfull Honda Inverter Generators. Click here for more detailed information on our HD P&P Pkg.- More efficient and compact HMI, Quartz, and now Fluorescent Par Lights.
- Brighter and more efficient "short arc" HMI bulb designs.
- 120/240V Electronic HMI ballasts with Power Factor Correction.
- Cool burning, energy efficient Fluorescent Lighting Fixtures.
- Innovative new rigging hardware.
__________________________________________________________________

CLICK ABOVE TO VISIT OUR WEBSITE AND DOWNLOAD A RENTAL CATALOG!
Phone (781)326-5088 *** Fax:(781)326-4751 *** rentals@screenlightandgrip.com